acontrast
- see also
This is not available on ffmpeg 3.x.
Using this filter is fairly simple. Just pass a value between 0 and 100 as a parameter:
[me@host: ~]$ ffplay some.wav -af acontrast=10
[me@host: ~]$ # if you have both ffmpeg 4.1 and 3.3
[me@host: ~]$ ffmpeg411="/c/Program Files/ffmpeg-4.1.1-win64-shared/bin/ffmpeg"
[me@host: ~]$ # on my windows, ffplay 4.x fails audio playback because of
[me@host: ~]$ # SDL initializing issues.
[me@host: ~]$ "${ffmpeg411}" -i some.wav -af acontrast=10 -f wav - | (ffplay - 2>/dev/null)
You can see that no matter what value you give, the volume will go up.
The official documentation says that this filter is simple audio dynamic range compression/expansion filter, and of course actually as a result, it affects the dynamic range.
However, it is not recommended to understand that this filter is for dynamic range adjustment. If you have to deal with audio that have to adjust the dynamic range, what this filter does is too simple.
Rather, simply think of it as one of the way of increasing volume. (Or, as another way of understanding, “increase the contrast” as the name of the filter suggests.) While its use is incomparably more complex than this filter, acompressor does “true” dynamic range adjustment.
If you understand this filter as “to increase volume”, this filter has the advantages that the dedicated volume filter does not. This filter is received in floating point format (range [-1, 1]) such as “AV_SAMPLE_FMT_FLTP”, it performs mapping with the following formula:
Based on this formula, the following image was processed for actual audio data:
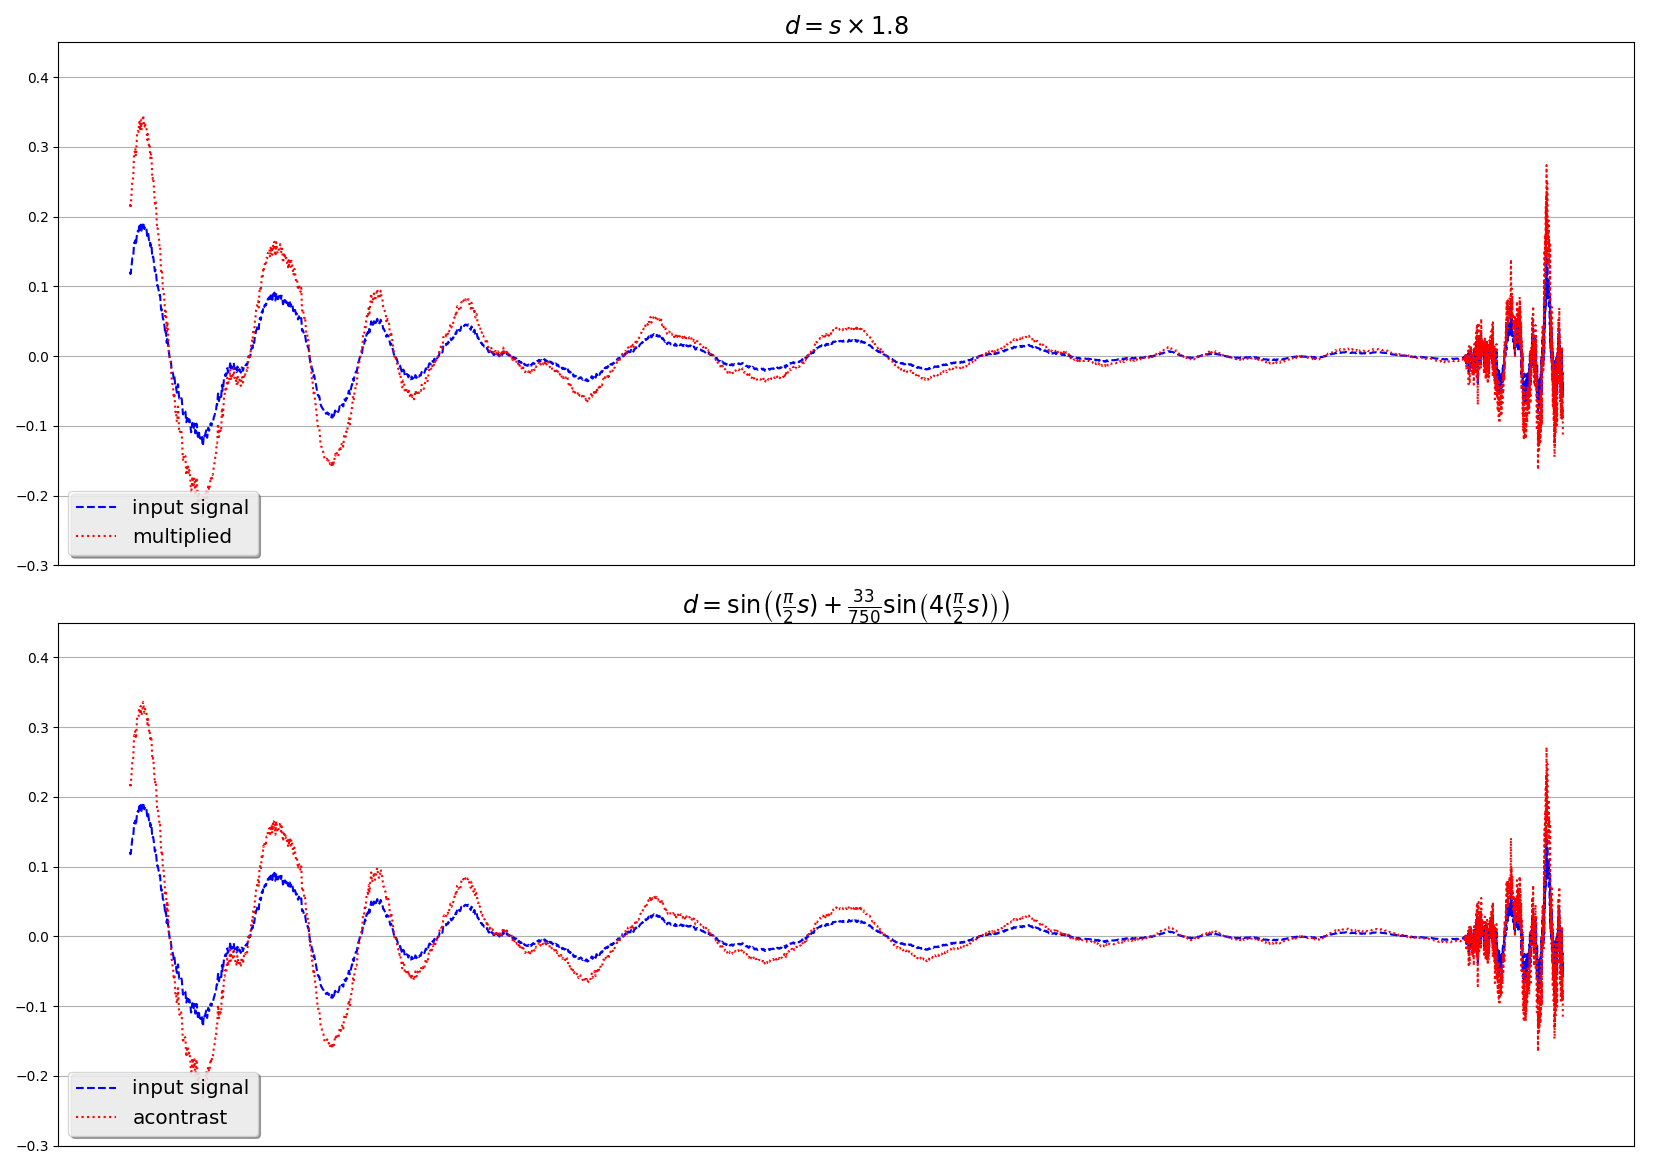
I don’t know the exact intent of this formula, but it is clear that the range of this mapping is the same [-1, 1] as that of the input. In other words, you can increase the volume without having to worry about clipping.